The Weekend Project - Ep 1: Make Your Own Envelope Cushion
- By Alicia Newman
- Uncategorised
- views
The Weekend Project - Ep1 - Envelope Cushion Cover
//
wistiaEmbed = Wistia.embed("whk6towbtd");
// ]]>
If you’ve caught the crafting bug but you’re not quite sure where to start, The Furniture Market’s Weekend Project is the series for you. Bringing you a brand new project every month, we provide you with everything you need to start making simple and beautiful home crafted items.
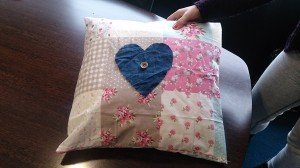
In this first edition we’re making envelope cushion covers. Mind-blowingly easy to make, it’s a tried and tested classic that anyone with an interest in crafting can make.
Try Up-cycling
Along with crafting, up-cycling has become a bit of a trend recently and with good reason! Reusing old material from clothing or other items and transforming them into something new and beautiful can give you a great sense of satisfaction as well as being brilliant for the planet.
We’re up-cycling an old dress with some new material, but you can use almost anything! It’s a great way to experiment with new looks and apply a design to your cushion with very little effort.
Everything You’ll Need
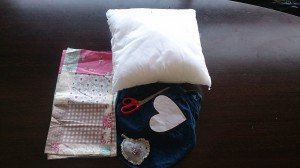
There’s very little needed to make a successful envelope cushion cover, which is why they’re so fantastic for first-time crafters. To get started, you’ll need to grab:
Fabric (three times the length of the cushion with an extra 5cm added to the width for the hem).
Thread
Pins
Sewing machine
Don’t worry if you don’t have a sewing machine with many functions – the trick to a successful envelope cushion cover is sticking to straight lines!
The Steps
Once you’ve measured and cut your fabric according to the size of your cushion, place the fabric the right side down and mark a 2.5cm hem along the width, folding the fabric at the mark. By either ironing the fabric down or make a temporary hand stitch to keep the hem folded, use your machine to sew a straight, running line securing the hem.
Flipping your material over on the table, place your cushion of choice towards the end of the material and fold over creating the envelope shape from which the cushion gets its name.
Using a pencil or chalk, mark the place the material touches. Remove the cushion and fold the material back to this point; you can now pin your cushion along the edges, leaving a 2.5cm mark for the hem along the side (many people find it helpful to mark the cushion again to ensure a straight line to sew along!)
Finally, sew along your 2.5cm lines, again using a straight edge. You can trim the edges down to create a neat hem of about 1.5cm, and then turn the cushion the right way around. Et voila! Your cushion is complete!
The Added Extras
There are plenty of added touches you could include on your cushion cover to take it to the next level of design. After you’ve tried out the basic construction, why not experiment to make the cover truly unique?
Some people love to knit, and you can create really beautiful covers from wool. Much like the sewing technique, a cushion cover is one of the easiest things to make for a beginner, and the look is so effective!
If your material is plain cotton, consider investing in some fabric paint and apply an interesting design to your cushion. If you’re handy with a paintbrush, this is a really easy way to show off that talent on something other than a picture.
Using two kinds of fabric can give your cushion a professional edge. You could try out applying a line of lace along the edges of the cushion, using two materials of the same colour with different patterns for the front and back, or cut out cute shapes to sew onto the front, such as love hearts or birds!


